Easy Dialogue System How to Connect Nodes


1.About the Dialogue System
The Dialogue System is the improved version of the Barefoot Dialogue System I have made in 2013. In this 5 years I had several Unity projects, that gave me more experience and improved my skills. I also worked with other game engines as well (unreal engine 4 for example). I was planning to update the old Barefoot Dialogue System to better support Unity 5 for a long time, but when I finally got enough time to do it, I decided to not to update, but fully rework and redesign the system.
After almost 6 months of development I proudly presend the new Dialogue System. I think I successfuly combined the old system's best features with a very modern and easy to use User Interface. I also added lots of useful tools to the asset, that hopefully will help you to work more rapid. Despite the 500+ logged hours of work, I still have work to do on this asset. I have many plans! And I will do it step by step in the future in form of updates.
2.Tutorials
2.1.How to create a conversation
Step 0: Create a new Scene. Create a new scene, or open an existing one. Create some environment (a plane, a directional light should be fine right now). Also add a character controller (for example the First Person Controller from Unity Standard Assets) to the scene.
Step 1: Create a new 3D object, a capsule. Name it John and add a Runemark Dialogue System / Dialogue Behaviour component to it.
Step 2: Before we could continue with John, we have to create a new dialogue graph: in the project panel click on the Create button, and select the Runemark / Dialogue System / New Dialogue menu. This will create a graph asset into the selected folder in the project tab.

You can doubleclick on it to open in the Dialogue Editor
Step 3: Create a simple dialogue
- Right click on the workspace (grid), and select the

- Click on the newly created node, and in the inspector, write some text, and add a new Next
- Connect the Conversation node to the Text node, by clicking on the Conversation node's output square and then the text node's input square.

Step 4: Assign the newly created Dialogue Graph to Johns Dialogue.
Step 5: Foldout the Conversation section and toggle the Enable option on.
Step 6: Under the Conversation box set the Trigger to Trigger Enter and set the Player Tag to Player.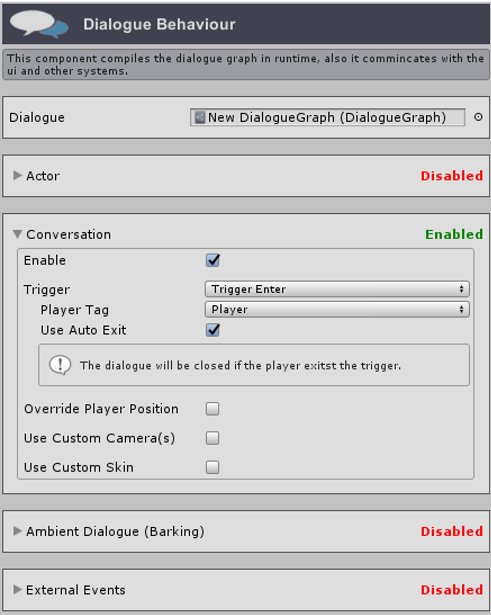
Step 7: Add a new Sphere Collider to John, and set it to Trigger and set its radius to 5
Step 8: Create a new Canvas in the Scene. Add a Conversation Controller ( Runemark Dialogue System / UI / Controllers / Conversation ) component to it.
Step 9: Drag and drop a Conversation Skin prefab from the RunemarkStudio / DialogueSystem / Prefabs / Skin folder as a child of the Canvas.
Step 10: Set the Conversation Controller Skin name to the one you dropped on the scene.
Press Play. When you go into John's trigger a dialogue window will appear.
2.2.How to create an Ambient Dialogue
Step 0 – 2: These are the very same steps we did in the Quick Start – Conversation section. You can repeat them, or you can use the same Scene, Dialogue Behaviour and Dialogue Graph you created.
Important: For the Ambient Dialogue you need to create a new, separate Canvas. The canvas Render Mode should be set to World Space, and it's transform scale to (0.05, 0.05, 0.05)
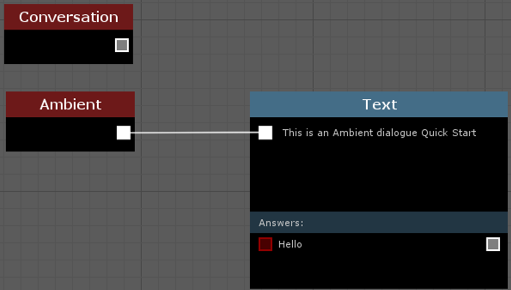
Step 3: Create a simple ambient dialogue
- Right click on the workspace (grid), and select the
- Click on the newly created node, and in the inspector write some text, and add a new Time (Ambient dialogues can have and should have only one Time answer. The ambient text will appear for a number of seconds you set here.
- Connect the Ambient node to the Text node.
- At this point your graph should look like this:
Step 4: Assign the newly created Dialogue Graph to Johns Dialogue (if you didn't do it already).
Step 5: Foldout the Ambient Dialogue (Barking) section and toggle the Enable option on.
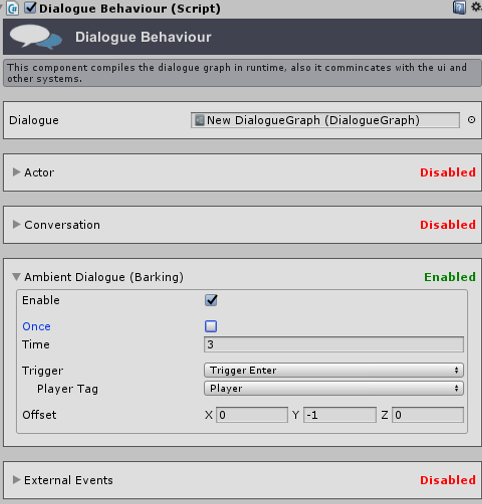 Step 6: Under the Ambient Dialogue (Barking) box set the Trigger to Trigger Enter and set the Player Tag to Player.
Step 7: Add a new Sphere Collider to John, and set it to trigger and set its radius to 5 (if you didn't do it already).
Step 8: Create a new Canvas in the Scene. Add an Ambient Controller ( Runemark Dialogue System / UI / Controllers / Ambient Dialogue ) component to it.
Step 9: Drag any of the premade Ambient Dialogue Skin prefab from the RunemarkStudio / DialogueSystem / Prefabs / Skin folder and drop on the scene as child of the newly created canvas.
Step 10: Set the Ambient Controller (step 8) Skin name to the one you dropped on the scene (step 9).
Press on play. When you go into John's trigger he will start the ambient dialogue.
2.3.How to create an UI Skin
Step 0: Create a new scene, and add a new Canvas to it. This canvas will be a temporary workspace only.
Step 1: Create an empty game object as a child of the canvas, and add a Dialogue System UI Skin component ( Runemark Dialogue System / UI / UI Skin ) to it. This Game Object will be our skin's root. Set its UI Type to Ambient Dialogue or to Conversation based on what type of skin you want to create. (Important: if you want to make an Ambient skin, don't forget to set the Canvas Render Mode to World Space, and the transform scale to (0.05, 0.05, 0.05))
Step 2: Create a new name by clicking on the cogwheel after the Skin Name drop down list – this will open the Skin Names window. In this window you can add a new Skin name to the list. The Toggle button after the name marks the name as Ambient Dialogue Skin, so if you are going to make an ambient skin, turn this on.
Step 3: Select the newly created name in the Dialogue System UI Skin component.
Step 4: Create your UI. (if you are new to Unity or to the Unity UI, you should start with these tutorials). The Dialogue System has very little requirements for the ui skin. You can create anything. But if you want to use the built in UIElements (I recommend to use it, otherwise you have to code your own elements) you have to keep in mind the following:
- Text (where the Actor Text appears) should be a Text
- Actor Name should be a Text.
- Actor Portrait should be an Image
-
 The Timer should be a Slider and a Text
 - The Custom Answers and the Next Answers from them the player can choose should be Button
Step 5: Add to your vital elements (see in the above list) the correct UI Element components ( Runemark Dialogue System / UI / Elements ). Right now the Dialogue System has four type of UIElement built-in: Text, Image, Timer and Answer Button.
Step 6: Assign the UIElement Component to the Dialogue System UI Skin component on the root game object.
Done. You can create a prefab from your skin root game object. To test it check the previous Quick Starts.
2.4.Simple Quest System
If you want to create a quest where your player should collect a number of items in order to complete the quest, you can do it in 4 easy steps.
1.) Create a Global Variable, and name it counter (you can name it anything you want).
2.) Make your dialogue graph with a Branch node (use True branch for the completed quest, and the False for before complete)
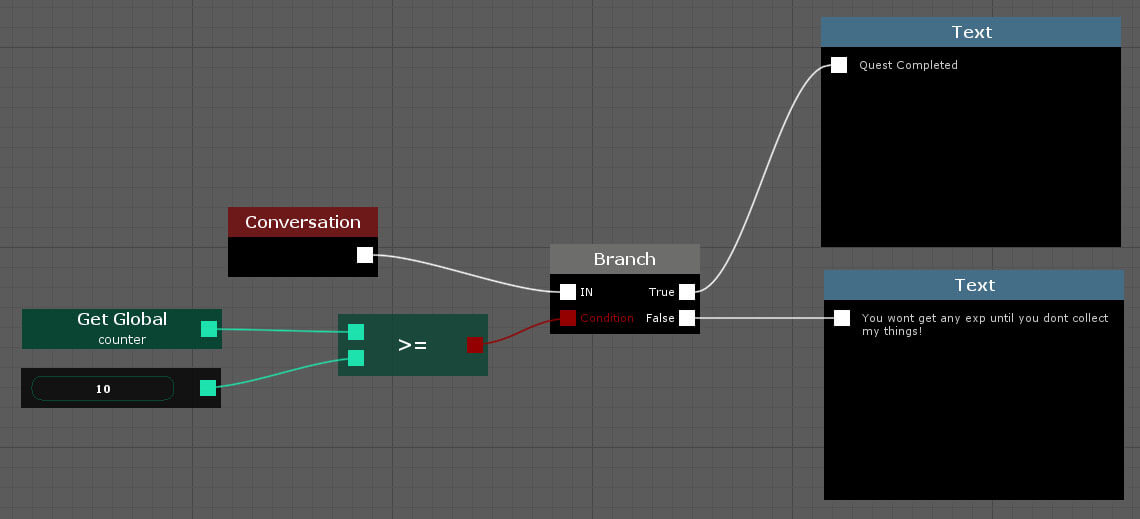
4.) Make a collection script, and increment the counter global variable.
private void OnTriggerEnter(Collider other) { if (other.tag == "Player") { // Do your collection like destroying the object...etc var counter = DialogueSystem.GetGlobalVariable("counter"); int newValue = counter.ConvertedValue<int>() + 1; DialogueSystem.SetGlobalVariable("counter", newValue); } } That's it. You can make a killing quest in a very similar way too.
3.Basics
The Dialogue System is a node based system, in the editor the Dialogue goes from left to right along the white wires. In generic terms this is called the Execution Flow. This flow always starts with an event (mostly with the Conversation or with the Ambient events) and finishes when no white wire goes out of the node.
Data also flows through wires, colored to match the variable types. Input pins are evaulated when the node executes, tracing the data wires back from right to left until the final result is calculated and supplied to the node. Nodes with executation pins store the value of their output pins when they execute, while nodes without execution pins reevaluate their outputs every time a node connected to their outputs executes.
Terms
- Action/Node: Nodes are the base units of the dialogue system. I call „Action" the node that is shown in the Graph Editor. You can find more information about nodes here.
- Actor: In the Dialogue System terms, the actor is the one who says the dialogue. This can be a vendor, a quest giver, or even an abstract one (tutorial for example). By default the Actor is the GameObject where the activated Dialogue Behaviour component is.
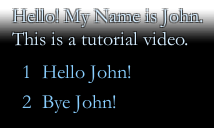
- Ambient Dialogue (Bark): The Actor says his lines accordingly, but the player can't directly react to these. (For example, a market vendor offering his goods by saying „Fresh fruits! Come and take a look!" in an ambient dialog.)
- Conversation: This is a „question – answer" type of dialogue between the actor and the player.
- Graph: A graph is a collection of nodes. Can be opened for editing in the Visual Editor, by double click.
- Variables: The dialogue system has several variables, that can be used to communicate with different system or make a more complex dialogue functionality, also these are the backbones of the built-in save/load solution.
- Wire: these represent the connection between nodes. White wires are the execution flow, while the colored ones are the data flow.
Differences between Local and Global Variables: Both can be accessed from the graph with set/get nodes, as well as from code. Local variables can be accessed only from the given graph. Global variables are accessable from every graph.
4.Using the editor

1. Local Variables
In this panel you can add new variables to the root graph as local variables the same way you would do it in the Unity Animator. By selecting a variable it will be opened in the inspector, where you can change its Name, and its Group (not used yet) as well as the Default Value (the variable will be set to this value every time you start the game). You can change the name of the variable by double clicking on its name in the list.
2. Workspace
Here you can create and connect nodes and make your dialogue graphs. You can use the following hotkeys in this area:
Navigating in the Workspace
- Pan: Middle Mouse Button + Drag
- Zoom: Mouse Scroll
- Context Menu: Right Mouse Button on a workspace brings up the Action List, on a node brings up the Node Menu instead.
Node Control
- Selecting a node: Left Mouse Button on a node
- Selecting multiple nodes: Shift/Ctrl + Left Mouse Button, or Left Mouse Button + Drag to draw a marquee selection tool.
- Dragging a node: Left Mouse Button + Drag
Wire Control
- Connecting: You can left click on any pin, this will create a wire that will follow your cursor. Then if you click on other pin the two will be connected. You can release the wire by pressing the Esc key.
- Disconnecting: Right Mouse button on a pin (if some of the connected pins still show connection – solid rectangle – click on it with right button)
Comment Box
You can create a comment box by pressing the C key. If there are nodes selected, the comment box will be resized to contain these nodes.
3. Inspector
When you select an item in the graph editor, it's properties will show up in the inspector window
5.Nodes
5.1.Branch

Very simple type of branch: based on the Condition input the execution flow will continue through the True or the False output.
5.2.Call Event
 This node provides a flexible way to communicate with external systems. You can call a method outside of the Dialogue System. In the inspector window you can define an Event Name that will be fired when this node becomes active.
You can get further informations about External Events under the Dialogue Behaviour section.
5.3.Custom Event
 If you need you can create events like OnOpen or OnBark. You can set it's name in the inspector window. Once it setup, you can call the Dialogue Behaviour method:
void CallEvent(string eventName)
This node may require more programming knowledge than the others.
5.4.Text Node
 This node is the most important node in the Dialogue System. It has a quite complex inspector window compered to other nodes.
Inspector
Actor Name: you can set the name of the speaking actor. If not set the system uses the name you set in the Dialogue Behaviour. Most common usage when you want an actor other than the active one interrupts the conversation.
Portrait: Here you can set a portrait to show it on the dialogue ui. This will override the portrait set on Dialogue Behaviour. The skin has to be set up to allow a portrait (check how to set up an ui skin). You can use this parameter for other than portrait too. If not set, no image is shown.
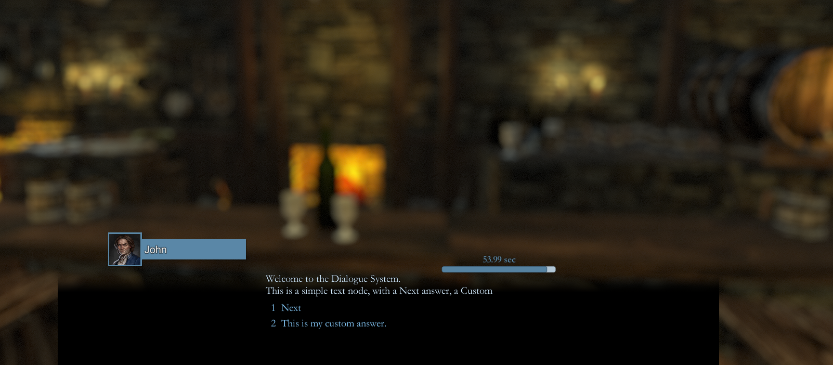
Text: Here comes the text the Actor says.
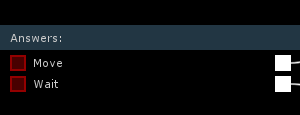
Answers: In general the answers are the options the player can choose. However there are some advanced usage options built in. You can add, remove and reorder answers in the inspector. There are three types of answers, but a text node can have only one next and/or time answer, but any number of custom answer.

- Custom Answer: You can set the text, and with the bool input (red square), you can control whether or not this answer should appear in the runtime answer list.
- Time: This answer type has two usages: first when only a single Time answer is on a text node (no other answer types) the conversation will continue after the defined seconds automatically. The other usage is to use it with other answers, in this case, the player will have X seconds to answer. (You can assign a timer in the UI)
Audio: In this section, you can assign an Audio Clip. When the Text node activates in runtime, the Audio Clip will be played
- Play Delay: you can delay the audio clip by seconds after the Text node activates in runtime.
- Playback: you can define the starting point and the endpoint of the Audio Clip for this Text Node. This way you can slice up a single audio clip for multiple text nodes. (with the „Play Audio" button, you can test in the editor)
Custom Camera: In this section, you can assign a custom camera for this Text Node. When the Text Node activates the Camera with the given camera index will be used. (you have to set the cameras in the Dialogue Behaviour)
Advanced Settings: In this section, you can find some advanced settings that aren't commonly needed for dialogue.
- Custom Skin: You can set a UI skin to use for this text node. This will override both the skin defined in the Dialogue Behaviour and the one that is set in the Dialogue UI Controller as default.
All of the above information is visually displayed in the workspace, as you can see in the screenshot in the right.
Variable Interpolation into Text and Answers
You can show dynamic values in your dialogues by using the Variable Interpolation of the Dialogue System. You can insert the current value of any Local or Global Variable as well as the name of the Actor or the Player.
To use this feature, you just write your texts, with predefined markers. Similat to the screenshot below.

Showing a local variable:
Simply write the name of the variable after the local: part.
{local:variablename} Showing a global variable: Simply write the name of the variable after the local: part.
{global:variablename} Showing the name of the player:
{player} Showing the name of the actor:
{actor} 5.5.Variable (Set, Get)
 With these nodes you can set or get the value of any local or global variable. This is a tool (with the other logic nodes) to implement simple logic for your dialogue (for example: simple quest system), but you can use the Local and Global Variables to communicate with system outside of the Dialogue System. Global Variables can be used as communication channel between Graphs.

When you create one of these nodes, you will see a gray box. You can set the Scope (Local or Global) and the name of the variable in the inspector.
The Set node has a variable output, this will return the new value of the variable that is set when this node was active last time.
You can read more about global variables here.
5.6.Weighted Branch
 This node is very useful if you want to display different type of text based on an int value.
The Node works like a switch: it checks which interval from the weights list contains the Value input, and continues the execution flow on that route.
You can connect a Random(int) node to the Value input for creating random Ambient Dialogue (bark).
You can add, remove or reorder wheight intervals in the node's inspector window.
5.7.Graph Organization
The Dialogue System provides several solutions to make your graph more readable and transparent.
5.7.1.Comment Box
 Comment boxes are groups. You can drag and drop a node into a comment box, and then move them when you drag the comment box itself. You can also set the commentbox name and color in the inspector to make a visual difference between groups.
 Creating a comment box is different than the other node. If you press the C key anywhere in the workspace a comment box will be created. If you do it while nodes are selected the comment box will be resized to contain all the selected nodes.
You can resize the comment box by selecting the comment box, and dragging one it's edge.
5.7.2.Portals
Portals are used to keep your graph nice and tidy. These nodes forward execution flow or variable to another portal without showing wire in the editor. The system has two type of portal node:Execution and Variable.
Every portal has a Portal Name parameter and an Is Input toggle. Variable Portals also have a Type parameter. You can set the parameters in the inspector. The Portals can find each other based on their Portal Names.
Variable Portals
 Variable Portals connection uses a One-to-Many design.
 You can set the Portal Name only on those nodes that have their IsInput toggle set to True. In case of an output node, you can select the Portal Name from a dropdown list. This list contains all the names of all input portals that exists in the loaded graph.
Portal Name should be unique: no two input variable portals can share the same name.
Execution Portals
 Execution Portals connection uses a Many-to-One design.
 Execution Portals works very similar to the Variable Portals, except the you can set the name directly on those nodes that have their IsInput toggle set to False.
5.8.Nodes for Advanced Logic
The Dialogue System is built on a framework that can be used as a Visual Programming Tool. The Visual Editor has some built in nodes that can be used to develop a simple logic for your dialogue. By simple logic I mean, it can work with four primitive types of variables: int, float, string and bool variables.
You might need some programming knowledge to use these.
5.8.1.Constant
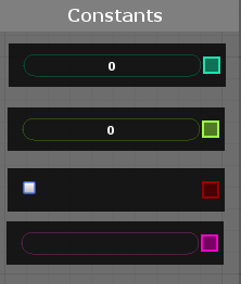 In most cases you can't just set a value of the input in the given node directly (like in the Weighted Branch node before, you can't just set the Value to 10 forexample), you have to connect an integer value to this input. This is works most of the times, but sometimes we need predefined values (contants) for our logic (let's say every time you open a dialogue you want to increase a root variable counter by one).
The Constant node is the solution for this need. You can create this node for the four primitive type: float, string and boolean.
5.8.2.Random
 This node creates a random integer or float value. The node uses the Unity's Random.Range method.
You can set the Range minimum (inclusive) and maximum (exclusive) value in the inspector.
5.8.3.Operators
 The editor has five operators built in, every operator has two version: one for integer and one for float variables.
The operators are: Addition (A+B), Subtraction (A – B), Multiplication (A * B), Division (A/B) and Modulus (A % B)
5.8.4.Relations
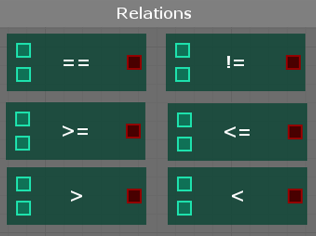 With these nodes you can compare two variable and get the result as a boolean value. All of these nodes have their version for integer and float types. The Equal and the Not Equal nodes has two additional versions for string and for boolean types.
There are six types of relations built in. These are: Equal, Not Equal, Greater Than, Greater Than or Equal To, Less Than, Less Than or Equal To.
5.8.5.Logical Operators
 The editor has three types of logical operator.
AND: returns the logical AND of the two inputs.
OR: returns the logical OR of the two inputs.
NOT: returns the logical complement of the single input.
5.8.6.Concatenate
 The node concatenates two string value and returns a new string.
Currently only works with two inputs, therefore if you want to concatenate multiple strings you have to chain these nodes.
5.8.7.To String
![]() This node converts any variable to a string. It safely converts primitives, but other types will be converted by using it's ToString() method.
This node converts any variable to a string. It safely converts primitives, but other types will be converted by using it's ToString() method.
5.8.8.Wait
 This node has a float variable that can be set directly or connected to other nodes. Either way this node will suspend the execution flow for the given amount of seconds.
5.8.9.Debug Log
 Sometimes it's useful to see whats happening in your logic. This node logs the given message to the Unity Console panel. It uses the Debug.Log mehtod.
You can use the ToString and the Concatenate nodes to create more complex debug messages.
6.Dialogue Behaviour
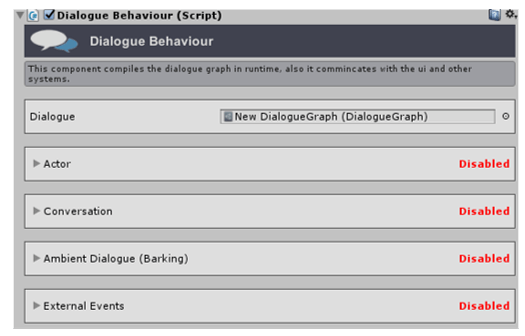 Runemark Dialogue System / Dialogue Behaviour
The Dialogue Behaviour handles almost every runtime functionality that the system has. The DialogueGraph is the plan for a house but, the Dialogue Behaviour is the worker who actually builds up the house.
There are four setting sections in this component. You can expand these sections and the first thing you will see, is an Enable Toggle.
You have to have one Dialogue Behaviour on each Actor you want the player to interact through conversations, or you want the Actor to fire Ambient Dialogues (Barks).
Actor
If it's enabled the dialogue system will use the Name and the Portrait you set in this section. If the Name is empty but set to Enabled, the system will use the GameObject name as Actor Name.

Important: Text Node overrides these settings; in that case, even if it's set to Disabled, the system will show the Name and Portrait already set in the Text Node.
Conversation

In this section you can define how you want to trigger the dialogue, want to use custom cameras as well as want to reposition the player character when the dialogue pops up.
Triggering the conversation will call the Conversation event in the dialogue graph.
Triggers
There is five different option you can use triggering a dialogue.
Trigger Enter: Very easy to use. You can select a Tag to filter the GameObject that can trigger the dialogue. Also you have to add a Sphere Collider to this game object, and set its type to trigger and set it's radius as you wish (I use 5 unit).
Use Auto Exit: If turned on, the system will close the conversation automatically, depending on the trigger you are using. If set to Trigger Enter, the conversation will be closed when the player exits the trigger. In case of Use, it will be closed if the player goes farther than the use distance. In case of Custom, you can set an Exit Distance, that works same as in case of Use. You can't however use Auto Exit in case of OnStart.
Exit Delay (Only visible if Use Auto Exit is enabled):You can set a number of second by with you can delay the close of the dialogue. 0 means the conversation closes instantly.
OnStart: A simple type of trigger, where the dialogue starts when the scene is loaded.
Use: If you are using this type of trigger, you need to call the Dialogue Behaviour void Use(Transform other) method in runtime. The other parameter should be the Transform of the player. You can set the player tag as in the Trigger Enter / Trigger Exit method, and also a distance parameter. The Use method will check if the other transform has the right tag, and is within the given distance.
Custom: If you want to trigger the dialogue in a different way, you can select this method, and call the Dialogue Behaviour void StartDialogue() method in runtime through script.
Override Player Position
Sometimes you want to see the player character on a certain position, to make the most of out your conversation. You can do it by setting the player tag, and the Position in this part. The Player Position accept only transforms. This only repositions the player when the conversation starts.
Use Custom Camera(s)
If you want to change the view during the conversation, you can do it here. You can drag and drop multiple cameras from the screen to the Cameras List.
Default Camera Index: this camera will be active during the conversation, when the current Text Node custom camera is Disabled. If this value is set to -1 the game main camera will be used instead.
What is Camera Index? This is the index number of the Cameras list. It start with 0 at the top of the list, and increments by 1 every element below. That's being said, the first camera in a list has the 0 index, the second camera has the 1 index… and so on.
Default Skin
You can set the skin you want to use for this conversation. You can find more information about Dialogue Skins and how to create them later in this documentation.
Ambient Dialogue (Bark)
In this section you can setup your ambient dialogue (Tutorial). The Trigger part of this section works the exact same way as it does in case of the Conversation.
Triggering the Ambient Dialogue will call the OnBark event in the dialogue graph.
Time: The behaviour will call the OnBark event in the dialogue graph in this interval. The time is measured in seconds.
External Events

This section is another option to communicate with systems outside of the Dialogue. This works pretty much the same as the Unity UI Button OnClick events are working.
You can add multiple Events to a single Dialogue Behavior. Every event on the same Dialogue Behavior should have an unique name. This name is used in the Call Event Node.
You can add multiple functions to a single event to be called when the event is fired.
Class Reference (advanced useage)
Important: This part is for those who have basic C# knowledge, or can use unity events!
public void StartDialogue()
This method will start the dialogue. Only works if the Conversation Trigger is set to Custom.
public void StopDialogue()
This method immadietly stops the dialogue, and therefore will close the active dialogue window too.
public void SelectAnswer(string id)
This method will select an answer. This method is called from the ui script as default.
public void SelectNextAnswer()
Same as the Select Answer, but no id needed, becouse it selects the next answer if exists.
public void StartBark()
This method will start the ambient dialogue. Only works if the Ambient Dialogue Trigger is set to Custom.
public void StopBark()
This method immadietly stops the ambient dialogue.
public void Use(Transform other)
This method will start a dialogue if the other transform has the right Tag and is whithin a given distance. Only works if the Conversation or the Ambient Dialogue trigger is set to Use.
public void CallEvent(string eventName)
Calls an event in the Dialogue Graph. The eventName should be the name of the Custom Event Node.
public T GetRootVariable<T>(string variableName)
This method returns the value of the root variable of the given variable name.
public void SetRootVariable<T>(string variableName, T value)
This method sets the value of the root variable of the given variable name.
7.User Interface
The UI solution of the Dialogue System is using modular skin system for maximum flexibility. You are able to use as many skins as you wish for your dialogues. You can even switch between them after every text node if you want to.
 You need a single Dialogue UI Controller component on your canvas, or on one of the child game object of your canvas. A skin is an empty gameobject with the Dialogue UI Skin component on it, and with ui elements as child object.
Check the UI Skin Tutorial to learn the basic steps how to create your own ui skin.
7.1.Dialogue UI Controllers
The dialogue system contains two types of UI Controllers, one is for Conversations and one is for Ambient Dialogues. Both of these controller components can be found under the component menu Runemark Dialogue System / UI / Controllers /

This component is controlling its child UI Skins and handles the dialogue system UI functionality (loading the text nodes, handling the player choices…etc). The Controller is fully independent from the actual UI elements.
Each time a Text Node activates in one of the Dialogue Behaviour on the scene, this component reacts to it, after it decided it should react or not. This decision is based on the type of the controller: Conversation controller only reacts to Text Nodes that are in the flow starting with the Conversation event node. And Ambient Controller only reacts to Ambient Dialogues.
Also this component decides which skin should be used:
- Checks if the Text Node skin parameter is set to a valid skin. If it's true, it shows that skin, otherwise
- checks if the Dialogue Behaviour default skin is set to a valid skin. If it's true, it shows that skin, otherwise
- it uses the Default Skin set as it's own parameter.
Valid skin means, the UI Controller has a skin with this name as a child object.
The Default Skin on this component can only be set to those that appear as a child of this gameobject.
7.2.Dialogue UI Skin
Component Menu: Runemark Dialogue System / UI / UISkin
 This component is where you can set up your own skin. This component should be on an empty game object.
Skin Name: You can set the name of the skin here, but instead of writing in a single string, you have to select from the predefined skin names. You can edit the skin names list by clicking on the „cogwheel" button after the dropdown list. This will open the Dialogue System UI Skins window, where you can add, remove skin names. If the toggle button after the name is turned on the skin is defined as Ambient Dialogue Skin.

The UI elements section is very self-explaining. The only required element is the Text element, the others are optionals.
You can find more information about the Timer and Answer UI Elements later in this document.
Answers – Dynamicaly Expand: If this option is enabled the system will automaticaly create more answer buttons if the Text Node has more answers than the skin's answer buttons. If its disabled, the system will only show number of answers up to the the manually created answer buttons.
Based on the UIController the skin is parented, the inspector can be different: ambient dialogues don't have any Answer related settings.
7.3.UI Elements
UIElements are bridge components between the asset Skin System and the actual UI solution you use. The skin system is ui independent becouse of these elements. The Dialogue System contains several UIElements to support uGUI elements, like Text, Image, Button. You can create your own UIElement for uGUI or any other GameObject based ui systems.
The system contains the following UIElements, you can find them under the Runemark Dialogue System / UI / Elements component menu.
Text
 This element controls the uGUI Text component that is on the same GameObject as this UIElement, or if the Find In Children is turned on the element will search for uGUI Text component in child objects.
Image
 This element controls the uGUI Image component that is on the same GameObject as this UIElement, or if the Find In Children is turned on the element will search for uGUI Image component in child objects.
Timer

The Timer element is a more complex UIElement, that is used for Time Ansers. This element needs a uGUI Slider and an uGUI Text component.
Text Answer
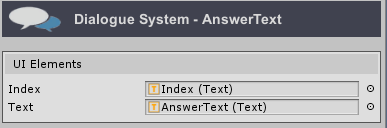
 The Text Answer element is used for Answers. This UIElement controls a uGUI Button, that should be on the same game object (no child is alowed). It needs a uGUI Text component to show the Answer, and an another Text component to show the Answer Index number.
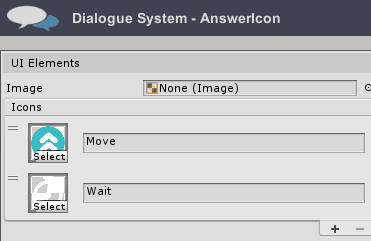
Icon Answer
 The Icon Answer somewhat similar to the Text Answer. It also controls a uGUI Button on the same game object. But instead of showing the Text Nodes answer as it is, it shows an image instead.
It needs an uGUI Image component.
 The UIElement also has an Icon Definition List. Here you can add new sprites to the list, and set an identifier string for all of them. Then you can use this identifier as answers in the Text Node.
Icon Library (helper for Icon Answer)
 Sometimes you want to store every answer icon in one place. This is your component to do that. You can find it under the Runemark Dialogue System / UI / Helper / Icon Library component menu.
 This work like the Icon Definition List on the Icon Answer. However, if this is added to a parent of an Icon Answer UIElement, the UIElement won't show it's Icon Definition List, instead will use this library.
Creating Your Own UIElement
This part for those who are familiar to the basic unity scripting. If you are not one of these people, but you need a custom UIElement, please contact me!
Adding your own UIElement logic to the system is pretty easy. You have to create a new C# script and inherit it from UIElement class (using Runemark.DialogueSystem.UI namespace), then you can override the Set<T> and/or the UpdateValue<T> methods.
Check the Timer element as reference:
[AddComponentMenu("Runemark Dialogue System/UI/Elements/Timer")] public class UIElementTimer : UIElement { public Slider Slider; public Text Label; public override void Set<T>(T value) { if (typeof(T) == typeof(float)) { float time = System.Convert.ToSingle(value); Slider.maxValue = time; Slider.value = time; Label.text = time.ToString("0.00") + " sec"; } else base.Set<T>(value); } public override void UpdateValue<T>(T value) { if (typeof(T) == typeof(float)) { float time = System.Convert.ToSingle(value); Slider.value = time; Label.text = time.ToString("0.00") + " sec"; } else base.UpdateValue<T>(value); } } 8.Global Variables
 Global variables are very important part of this system. You can comunicate between your dialogue behaviours through global variables. Also this is another way to connect the Dialogue System with other systems.
You can manage your Global Variables by opening the editor window under the Window/Runemark/Global Variables menu. Here you can create, delete and edit variables of string, integer, float or boolean types.
You can access these variables in the Graph editor with the Variable Nodes, but you can also access them from code with the Dialogue System Static Class (see below).
Dialogue System Static Class
Namespace: Runemark.DialogueSystem
This is a static class that gives acces to global variables through code.
public static Variable GetGlobalVariable(string name)
The method returns the global variable with the specified name. The returned value is a Variable class. Best way to get the actual value is using this class's public T ConvertedValue<T>() method. This is a generic method, you have to set the type of the variable. For example: ConvertedValue<string>()
public static void SetGlobalVariable<T>(string name, T value)
Sets the value of the global variable with the specified name. It gives an error if the type of the new value doesn't match with the variable type.
9.Save & Load in Runtime
The Dialogue System has multiple ways to save and load your runtime progresses. Important to note here that you can save and load only the variables that are marked as Saveable. You can only load Local variables for Graph that are assigned to the Dialogue Behaviours on the active scene. Local Variables are connecting to Dialogue Behaviours, not to Graphs when it comes to saving and loading. So if you assign the same Graph to multiple Dialogue Behaviours, the system will save the local variables separately for every Dialogue Behaviour.
Easiest way: Drag & Drop

As the easiest solution, you can drag & drop the „Basic Save & Load" prefab to the scene from RunemarkStudio/DialogueSystem/Prefabs folder in your project tab.
This prefab contains a simple component on it where you can set a few options.
Save Mode: you can choose whether the system should save the variables into PlayerPrefs or into a text file. In case you choose the File mode the system will save the file to the path defined in the Application.dataPath. You can set the name of the file if you wish.
Save on Exit: if this is checked the component will automatically call the Save method from OnApplicationQuit(). Otherwise you have to call the component's public void Save() method manually (possibly from UI).
Load on Start: if this is checked the component will automatically call the Load method from Start(). Otherwise you have to call the component's public void Load() method manually (possibly from UI).
Advanced way: DialogueSystemSaveLoad static class
In case you want different save & load functionality you have to use the DialogueSystemSaveLoad static class from the Runemark.DialogueSystem namespace.
public static void SaveToPlayerPrefs()
This method will save the saveable global variables and all saveable local variables fromthe dialogue behaviours that are on the scene into the PlayerPrefs.
public static void LoadFromPlayerPrefs()
This method loads the saveable global variables and all saveable local variables from the dialogue behaviours that are on the scene from the PlayerPrefs.
public static string SerializeToString ()
This method will serialize all global and local variables (from the scene) into a string. You can use save this string as you wish.
public static void DeserializeFromString (string s)
This method will deserialize the string.
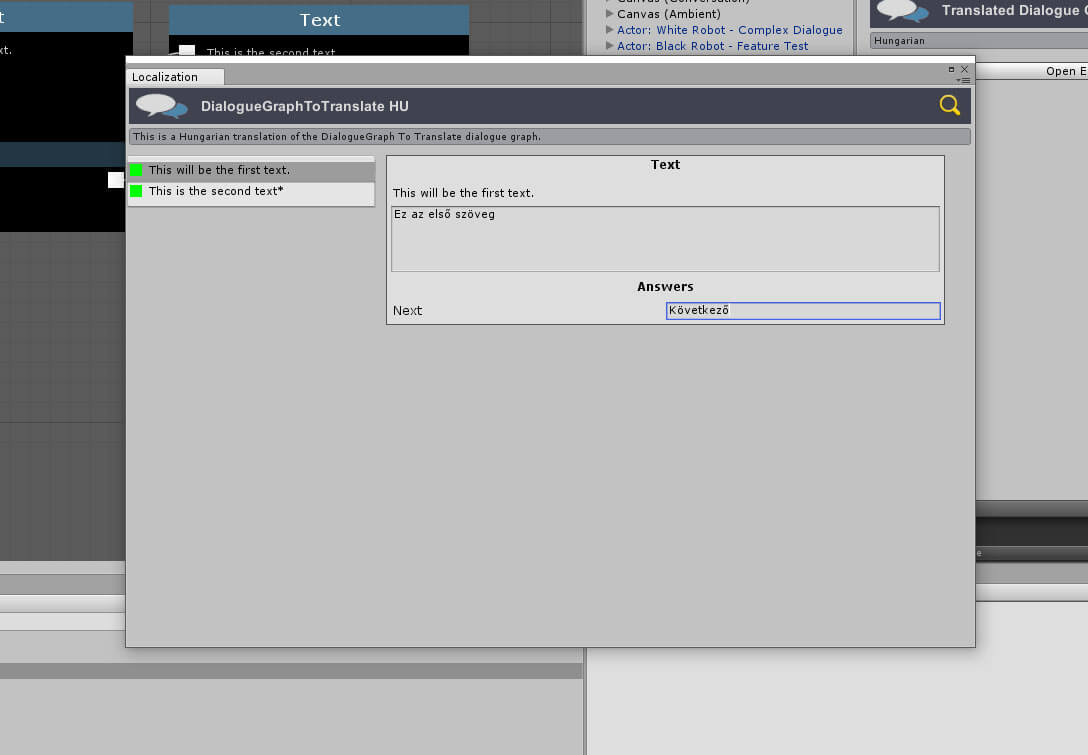
10.Localization
With the release of 2.2.0, Dialogue System has a built-in solution for localization (multi-language support). You can create translation for your dialogue graph quick and easy following these steps:
Setting up the Language Database
First, open the Language Database, navigate to the menu: Window/Runemark/Language Database.
Clicking on this menu item will select the Language Database in your project. This is under the Assets/RunemarkStudio/DialogueSystem/Resources folder. You can move it anywhere you want, but keep in mind this asset should live in your Resources folder.

Once selected, you can add or remove any language you want in your game. If you are using localization, you always should set the default language. The system will show the text that is in the dialogue graph when you select this language.
Creating a Translated Graph
Create a new translated graph, by selecting the New Dialogue Translation menu item under the Create/Runemark/Dialogue System.

This will create a new scriptable object in the current folder. Double click on it to open the Localization window. When you first open this asset, you will see the setup window. Assign the Original Dialogue Graph, the one you want to translate and set the Language of the translation. Finally, click on the Setup button.

On the left side of the localization editor, you can see all of your text nodes in your dialogue graph. Selecting them will open the Editor panel on the right side, where you can write your translations for the Text, for the Answers and for the Actor Name.
Clicking on the yellow magnifier icon on the top-right corner will highlight the translated graph you edit.
Setting the Language in runtime
You can change the current language any time in runtime with the code below. Language Index parameter is an integer.
LanguageDatabase.Instance.SetCurrentIndex(languageIndex);
I added a sample ChangeLanguage script. This script will set the language when the game starts.

It also has a public method that you can use with UnityEvents without the need of coding.
SetLanguage(int languageIndex)
11.Extras
11.1.Example Skins
The asset contains a few example skin too. I'm not an ui artist, so these skins are pretty simple. I used only the unity built in ui-s, no textures only played with layouts and colors. Originaly these were only test pieces for development, but I decided to include them as example, and also for Quick Start.
Witcher Skin
My first skin to test the Dialogue System. I chosed Witcher 3 for two reason: one becouse I liked it, second becouse it had the timed answer feature.
This skin doesn't support Portraits and Actor Names.
Fantasy Skin
In the second testing skin I added the support to Portraits and Actor Names. I also made the Portrait and the Name little more complex, by adding them a background.
I wanted to hide the background when the Actor Name is not visible. I made an Image as background (Name) and added a Text to it as child for the actual Actor Name (NameText). Then I added the UIElementText to the background (Name) and checked the Find In Children option. Then I made the same with the Portrait.
12.Integrations
12.1.Playmaker
This section explains how to use Hutong Games' PlayMaker with the Runemark Dialogue System.
12.1.1.PlayMaker Actions
The Dialogue System provides the following Actions, listed under Runemark Dialogue System in PlayMaker's Action Browser.
Start Conversation
![]() This action starts the conversation on the selected Actor. Only works if the Conversation Trigger is set to Custom.
This action starts the conversation on the selected Actor. Only works if the Conversation Trigger is set to Custom.
Actor: The actor with a Dialogue Behaviour on it.
Stop Conversation
![]() This action stops the conversation on the selected Actor. Only works if the Conversation Trigger is set to Custom.
This action stops the conversation on the selected Actor. Only works if the Conversation Trigger is set to Custom.
Actor: The actor with a Dialogue Behaviour on it.
Start Ambient Dialogue
![]() This action starts the ambient dialogue on the selected Actor. Only works if the Ambient Dialogue Trigger is set to Custom.
This action starts the ambient dialogue on the selected Actor. Only works if the Ambient Dialogue Trigger is set to Custom.
Actor: The actor with a Dialogue Behaviour on it.
Stop Ambient Dialogue
![]() This action stops the ambient dialogue on the selected Actor. Only works if the Ambient Dialogue Trigger is set to Custom.
This action stops the ambient dialogue on the selected Actor. Only works if the Ambient Dialogue Trigger is set to Custom.
Actor: The actor with a Dialogue Behaviour on it.
Get <type> Variable
This action gets a Global or a Local variable in the dialogue system. There is four variation of this action: string, integer, float and boolean.

Variable Name: The name of the variable.
Is Global: If checked we are using global variable list, otherwise the selected Actors local variables.
Actor (only needed if IsGlobal turned off): The selected Actor.
Result: The action will store the value of the Dialogue System variable in this Playmaker variable.
Set <type> Variable
This action sets a Global or a Local variable in the dialogue system. There is four variation of this action: string, integer, float and boolean.
 Variable Name: The name of the variable.
Is Global: If checked we are using global variable list, otherwise the selected Actors local variables.
Actor (only needed if IsGlobal turned off): The selected Actor.
Value: The value to set the variable.
12.1.2.Nodes for PlayMaker
PlayMaker Event Call
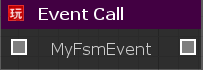
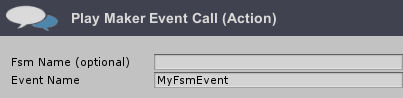 This node calls an event defined in PlayMaker. The node can send an event to a PlayMaker FSM that is on the current Actors game object. Or to an FSM with the specified name on the scene.
Fsm Name (optional): The name of the FSM. The should be unique in the scene. If not set, the system will use the Fsm on the Actor (if there is more than one FSM on the Actor and no Fsm Name is set, the system will choose the first one)
Event Name:The name of the even you want to call.
12.2.Cinemachine
This section explains how to use Cinemachine with Dialogue System. Cinemachine is a unified in-game camera system, that Unity released as free asset.
You can use every Cinemachine Camera (Virtual Cameras, Free Look Camera…etc) as you would use the built-in Camera with the Dialogue System (you can read about this under the Dialogue Behavior Section)
 If you import Cinemachine into your project, the Dialogue System will automatically recognize it, and allows you an option to change the Camera Type on the Dialogue Behaviour under the Use Custom Camera(s) section.
If you set the Camera Type to Cinemachine, the Cameras list below will change its element type to Cinemachine Virtual Camera Base. You can drag & drop here every Cinemachine camera type.
Which one is my Main Camera?
If you are using Cinemachine the classic solution (setting the Camera Tag to Main Camera) doesn't really work. However you can set the Priority Value for every Cinemachine Camera. The Dialogue System uses the Cinemachine Camera with the highest priority as Main Camera!
Important: Changing the Camera Type will clear the Cameras list!
Source: https://runemarkstudio.com/dialogue-system-documentation/
0 Response to "Easy Dialogue System How to Connect Nodes"
Post a Comment